No matter how long you’ve been in crypto, you’ve probably heard of Metamask. But are making the most out of it?
Metamask is one of the most popular Web3 wallets in decentralized finance (DeFi). The only app you need to connect to trade thousands of tokens, connect to Ethereum-based platforms, and store crypto without ever giving up control of your tokens. Coincidentally, the DeFi summer of 2020 followed a few months after Metamask released the first mobile versions.
But Metamask has a lot more to offer in 2023 than back then. So if you’re still using it the old-fashioned way, this article will help you go through the latest features and how to use them to your advantage— starting from least to most advanced.
Quick Takes:
- Metamask has simplified the way you add custom tokens, approve/revoke contracts, and change gas fees.
- You can easily upgrade your Metamask security with extra accounts, hardware wallets, and multi-sig dApps.
- The Metamask Portfolio shows your total balance across blockchains and several DeFi tools in the same place, such as staking, NFTs, and bridges.
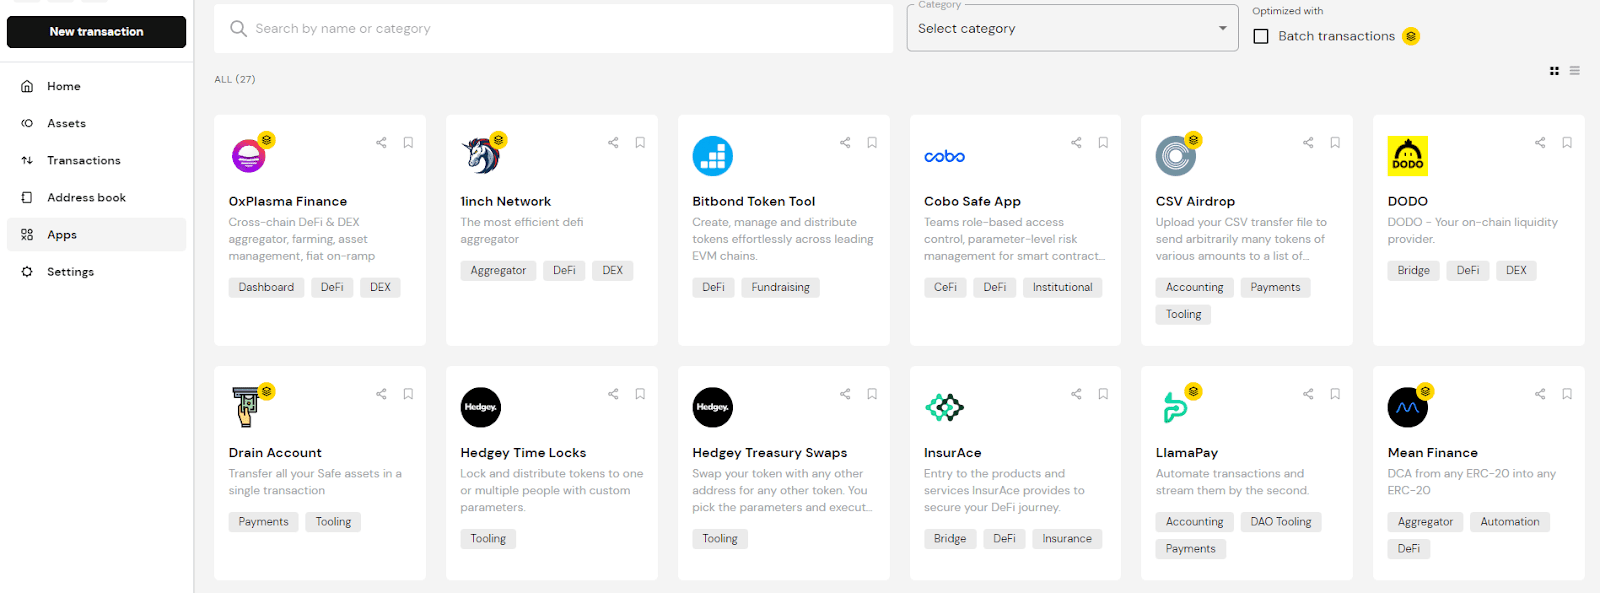
Access Your Metamask Portfolio
One of the latest 2023 features is the Metamask Portfolio. Not only does it show all your tokens across networks, but it brings to one place many basic DeFi features like staking, bridges, or token exchanges.
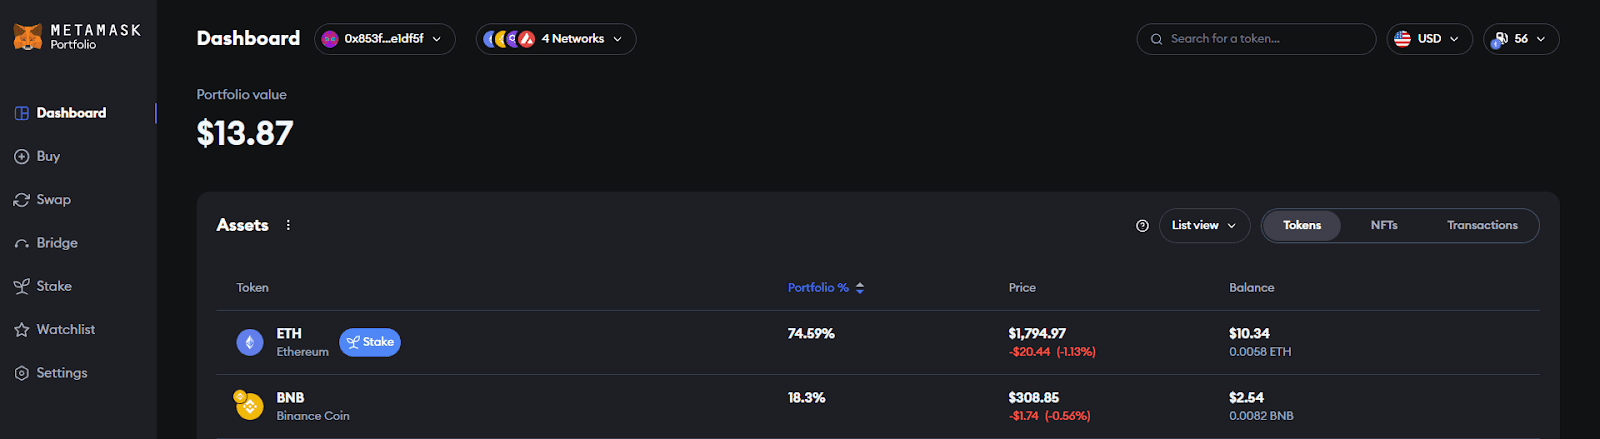
Metamask itself doesn’t design most of these but instead aggregates quotes from other platforms. To try it yourself, go to portfolio.metamask.io, or from the extension, click either on “Buy” or “Bridge” to redirect.
The Portfolio also brings an underrated feature that DeFi DEXs don’t have yet: watchlists. Add coins you don’t own yet to the same list regardless of their native network. Just like CoinMarketCap, except with trading functionality.
Import and Display NFTs
Metamask now allows you to connect to Opensea and load all your NFTs from the same app.
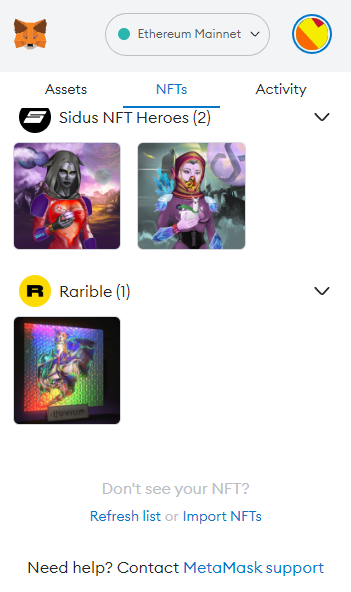
To enable this feature, you go to Settings, Experimental, and toggle “Enable Opensea API.” The first part (Opensea Beta) isn’t required.
Unlike tokens, NFTs will instantly appear whenever you buy or get an airdrop. So far, it works only on Ethereum and Polygon.
Fun fact: If you check this on Metamask Portfolio, you might find a LOT of “NFTs” you didn’t know you have. Opensea doesn’t upload them on the blockchain until there’s a first purchase, which means that creating pictures and transferring them is FREE. Scammers can send anyone messages as images or fake collections, especially once you bought a valuable few. Thankfully, the default settings only show the NFTs you bought.
Open More Metamask Wallets
This “trick” can be inconvenient. But when you take the time to set up more Metamask accounts, you can reduce the risk of losing your coins. This is the case whether you keep some on custodial wallets, lose an account, or someone accesses it.
If someone finds your Metamask private keys, they can also access any network you used and their balances. They still need to find and add every token and blockchain to actually see your funds. Etherscan makes it too easy:
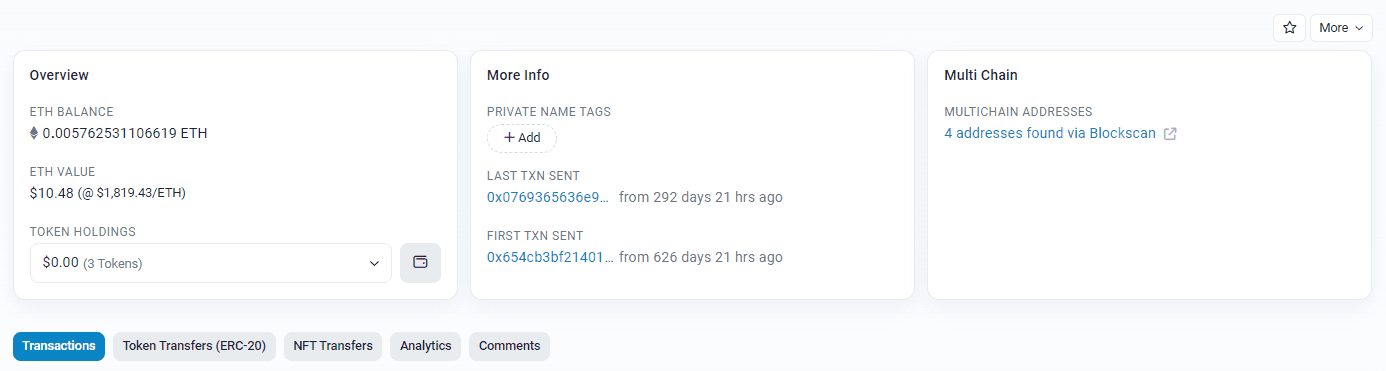
Just paste your wallet’s public address, and it will show you all tokens and balances. Also useful to find all the coins you don’t remember buying.
But the attacker can’t access other wallets, because every account is a different private key. This is convenient because from the Metamask app, switching accounts/wallets is as easy as clicking it.

To steal all accounts at once, someone would have to get your device and the Metamask password. And if you ever lose your phone, it’s good practice to save every private key and remove unused accounts from the list, and only add them when needed.
One more benefit about multiple accounts: you can make a dummy wallet if you ever have to connect to sketchy platforms.
Use Multiple Networks
As big as the Ethereum ecosystem is, that doesn’t mean every top project will appear in it. Using multiple blockchains not only gives you access to more dApps but also secures your coins against potential hacks.
Suppose you accidentally sign a fraudulent Metamask contract. The attacker might be able to steal all tokens from that blockchain. But not if you store them not others.
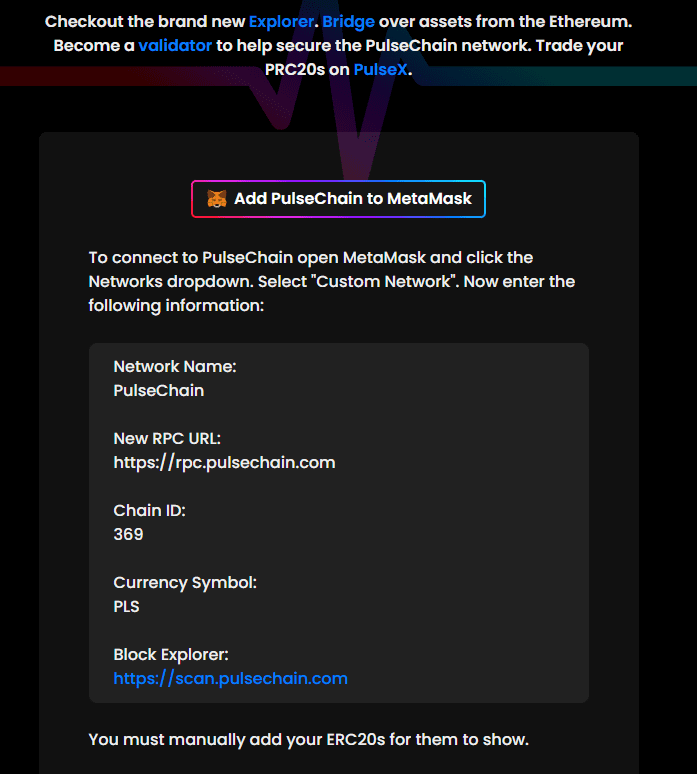
This common-knowledge “trick” is a double-edged sword. You do reduce the loss in case of cyber-attack, but you’re assuming that the other networks and their bridges are secure. So it’s recommended to stick to Ethereum-compatible networks like Pulsechain, Avalanche, or Polygon (BnB chain too but is more centralized), also known as EVM-supported.
The latest Metamask versions allow you to add these common networks with a few clicks. But if the one you need doesn’t appear, you can manually add the blockchain using the address from the official site. For example, here’s how to add Pulsechain Mainnet to Metamask:
Contract Revoking
If you’ve used Metamask for long enough, there might be dozens of dApps that you don’t even remember linking. Usually after connecting, DeFi platforms will send you an “approval contract” to your Metamask to allow a specific action.
But few of us actually read the technical details of every contract signed. Some of these can be malicious, enabling permissions like:
- Spend all tokens without amount limit
- Spend a token with no expiration time
- Send all tokens to another address
The “expiration time” still needs to be long enough not to be inconvenient, because every approval signature incurs gas fees. But if it’s, say, years away, that’s a risk. Right now, there might be attackers waiting for you to deposit a big amount on Metamask to steal it because you signed the contract long ago.
Metamask recommends revoke tools like Revoke.cash, Unrekt, Approved.zone, CoinTool, and Beefy.finance. It’s good practice that regularly connect to any of these dApps to view all approved contracts. If you see something weird, you can remove a dApp permission for a small gas fee.
Metamask Layer-2 Networks
The average Metamask user trades on the default network Ethereum. Maybe you also looked into BnB Chain or Solana to find better cost-efficiency. The problem is, other big networks don’t usually offer the same dApps and tokens.
Unless it’s as popular as Uniswap, it might take years (if ever) until your favorite dApp expands to non-compatible chains.
Layer-2 (L2) networks however are more compatible (but not as widely used yet). There’s a high chance you find the same Ethereum projects on blockchains like Arbitrum or Optimism, and their token bridges are more secure too.
So if you transfer the Ethereum balance to Layer-2 solutions, you would access most of the same assets and platforms with far better transaction speed and cost— but lower liquidity. Ethereum still will be more secure because of its size, so you could always send back tokens from L2s.
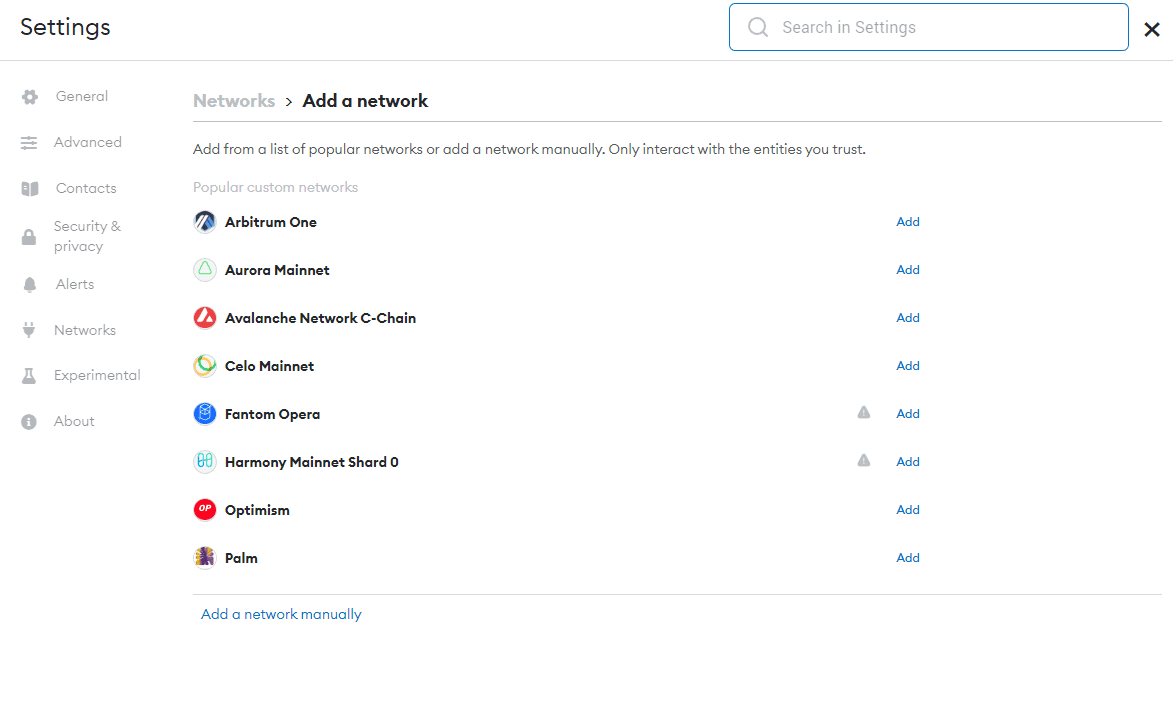
If you never tried it, the experience is almost the same. You add them to Metamask like every other custom network:
Metamask Multi Signature Wallet
While DeFi makes finance accessible to unbanked people, it’s also making the bankless approach more common. Maybe you do have the option to open bank accounts, but you’d rather keep full control of your funds than trust a company. That’s why more people choose to buy crypto and stables to keep on hardware and Web3 wallets like Metamask.
However, whether you trust a bank or yourself, you’re still exposed to a single point of failure. You could too create more wallet accounts, but to remember and switch funds among them can be tedious. Instead, you can connect all those Metamask accounts to a single multi-signature wallet like Gnosis Safe.
While it’s not technically a built-in Metamask feature, it’s a must-have for those saving crypto long-term. A major advantage over just hardware or cold wallets is that it connects to most dApps like Metamask.
If a platform doesn’t appear, you can import it to Gnosis using WalletConnect.
We won’t go through the full process here, but essentially:
- You pay a gas fee to open a vault on your network of choice (e.g., Ethereum). The first Metamask account that created it is the owner of the Safe.
- With the same wallet connected, you can add secondary accounts or other people you trust.
- You can set the minimum confirmations required per transaction after adding a second owner. Everyone gets a notification whenever any owner makes a transaction, but it only goes through if, say, 3 out of 5 owners click the Authorize button.
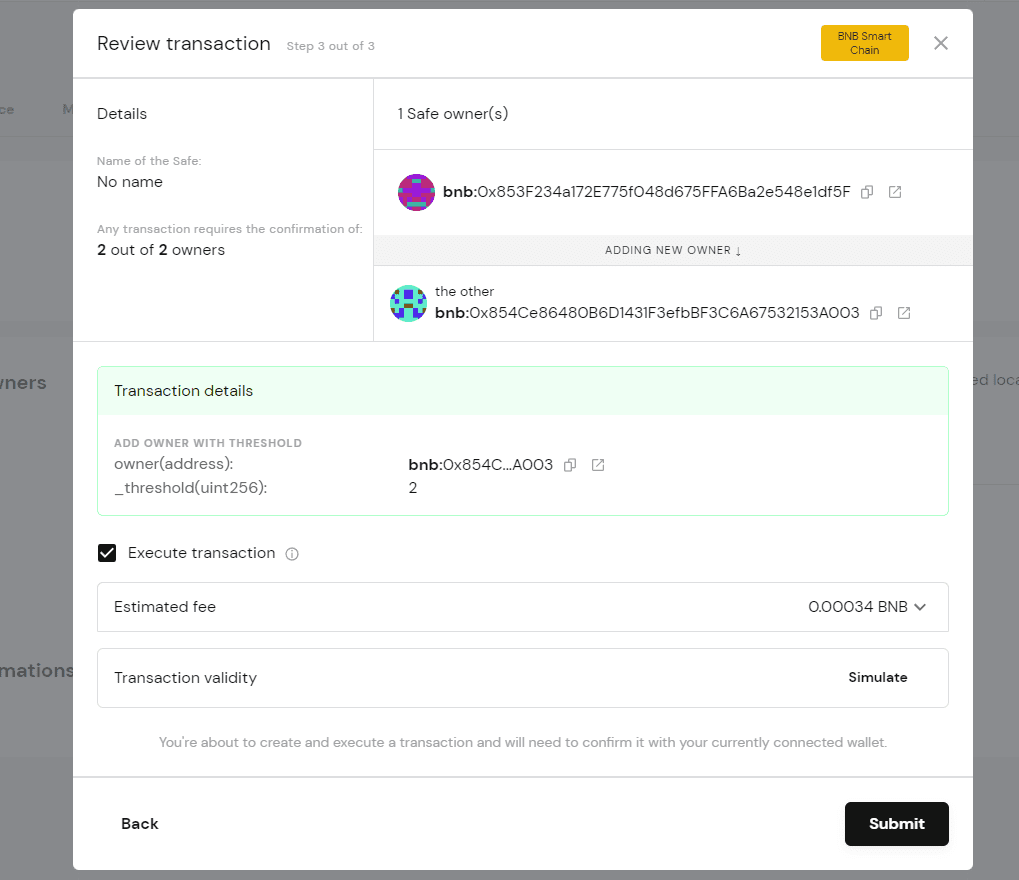
Once set, anyone can deposit crypto to the Safe address, but to withdraw, you need certain confirmations. This is useful because:
E.g., If you lose a Metamask wallet but kept the funds in the Safe, you canstill access them. You just need to set fewer confirmations than the number of “owners.”
If you then connect to Uniswap from Gnosis dApps, it would use the safe’s address instead. And if someone steals your private keys, they still can’t use the Safe unless they access your other wallets.
Connect Metamask to Hardware Wallets
Metamask can only be so secure as a Web3 hot wallet. It’s safer than the average crypto exchange account but not as safe as offline wallets. Luckily, Metamask is compatible with hardware wallets, so you don’t have to always keep all your coins online.
Or at least one password away from full access.
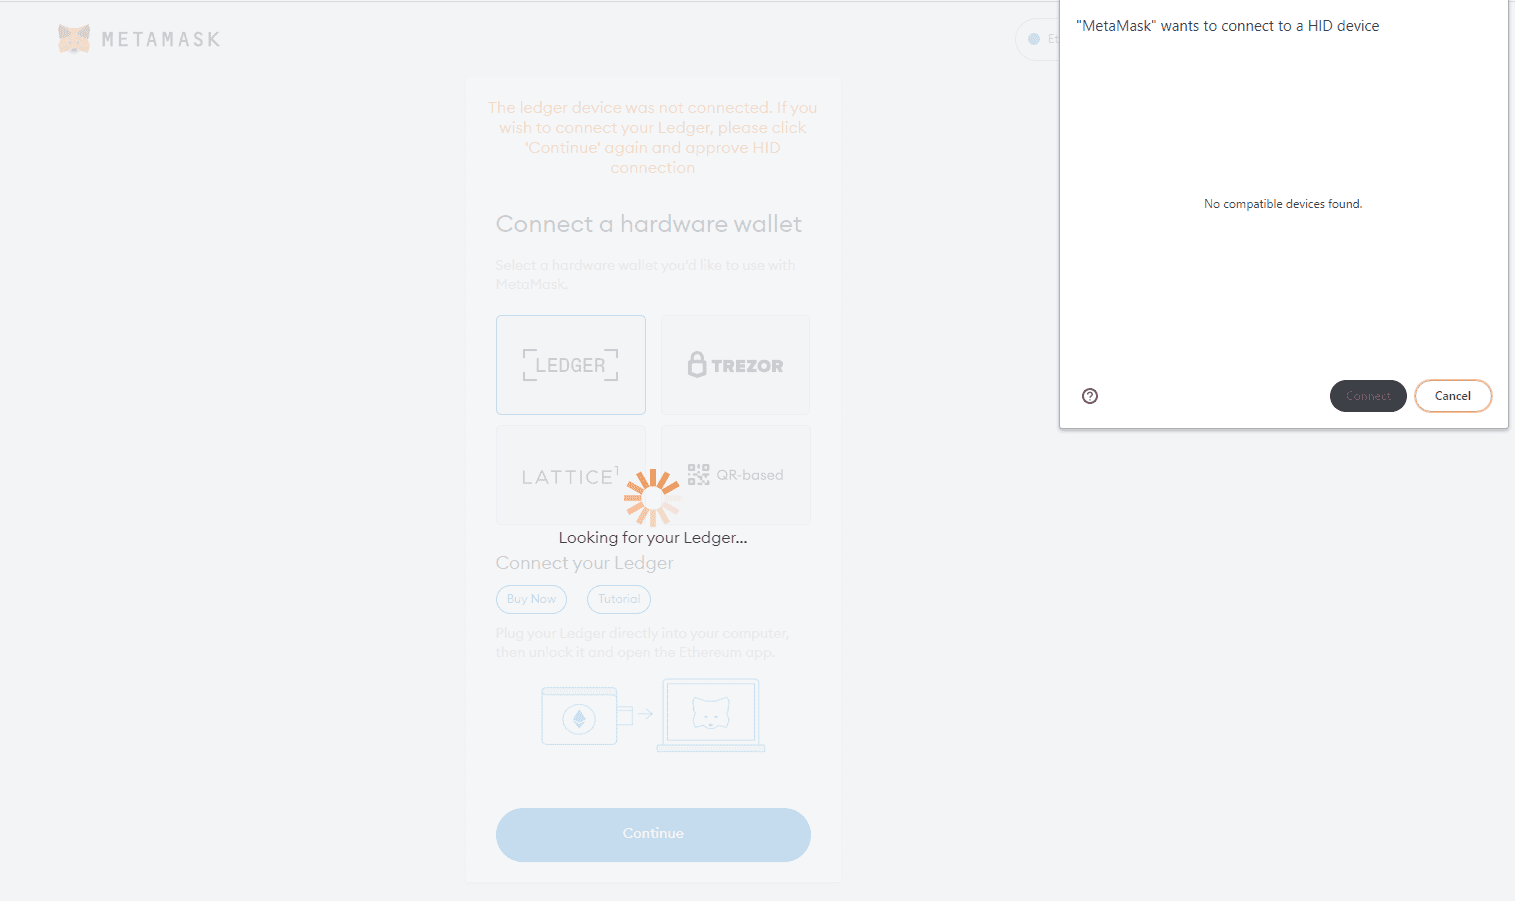
There’s no setup needed to connect Metamask to Ledger or other wallets— other than having an account created. Simply select the wallet brand that you own, connect to the computer/mobile phone, and it’s ready. Access this feature from the account avatar menu:
You can then spend those funds while connected to dApps or transfer them to the Metamask wallet.
Customize Your Gas Fees
It’s no secret now that Ethereum is one of the most expensive networks for its gas fees. But before you switch to other blockchains, there are quick fixes you can try to substantially reduce this cost. If transaction speed isn’t so important, you might be overpaying gas fees.
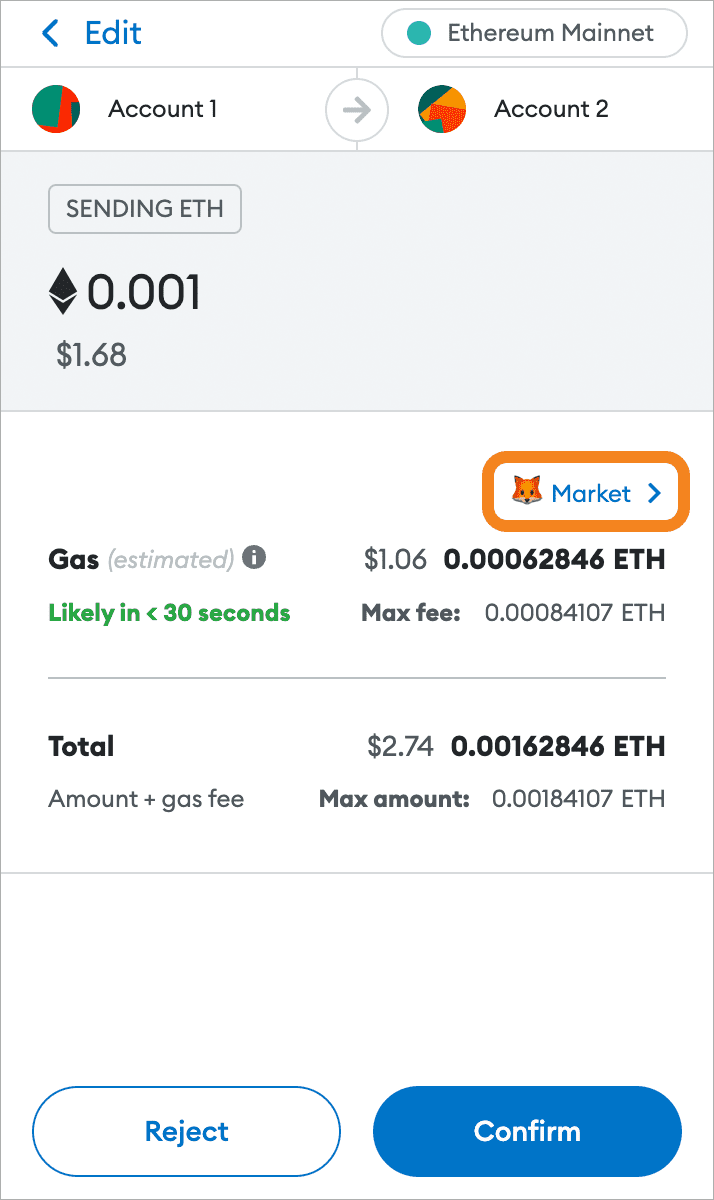
Before you confirm a transaction, there’s a custom-fee option next to the default gas shown. From there, you can manually set your price or select among three simpler modes:
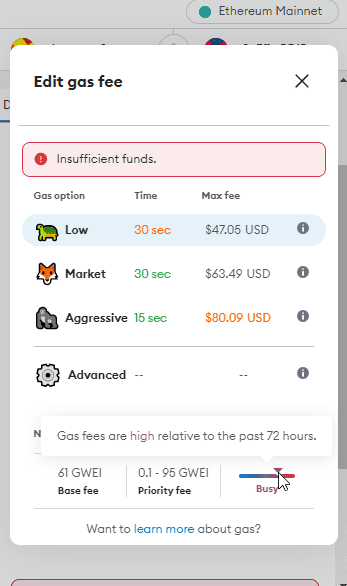
Selecting these modes likely won’t reduce your base gas fee, only the maximum fee. Basically, the more you pay, the faster it will confirm. If you choose the highest option, you pay similar fees, but once confirmed it might spend more than initially.
If you don’t have the extra ETH, the transaction fails.
If you select “Low” or cheaper, your transaction eventually would complete. But if validators don’t confirm it within certain hours or days it also cancels. Otherwise, it would saturate the network with cheap requests delayed infinitely.
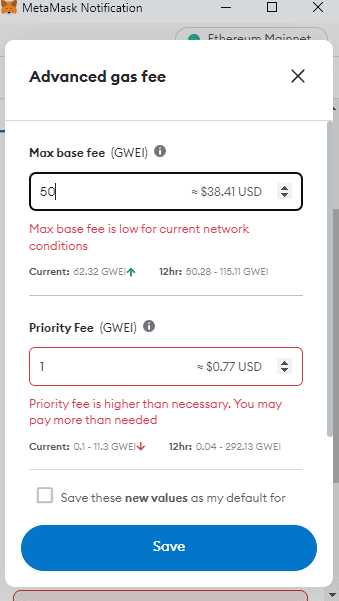
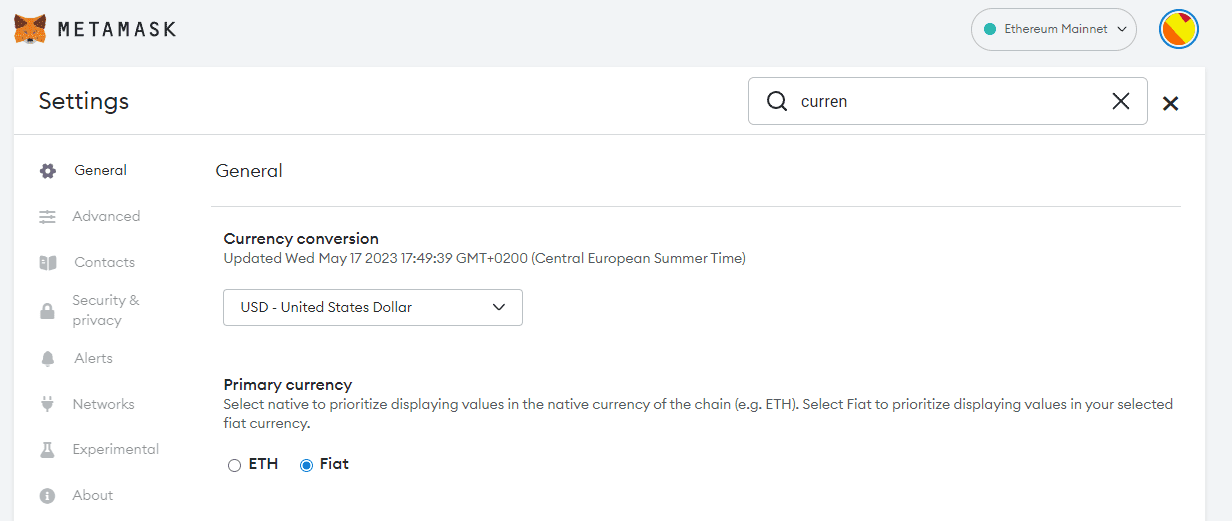
Without knowing the technicals, you can play with custom fees and Metamask will tell you if they’re a good choice. By default, it shows everything in ETH decimals or GWei. You can switch to USD format from settings:
Adding Custom Tokens the Right Way
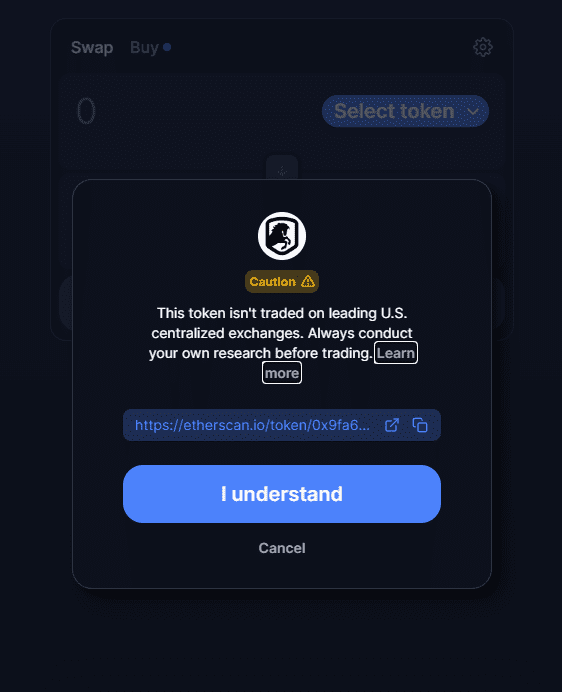
There’s no earlier way to invest in new projects than manually adding their tokens. It’s a simple process, but it’s easy to get wrong. Again, some people will try to steal your coins creating fake listings.
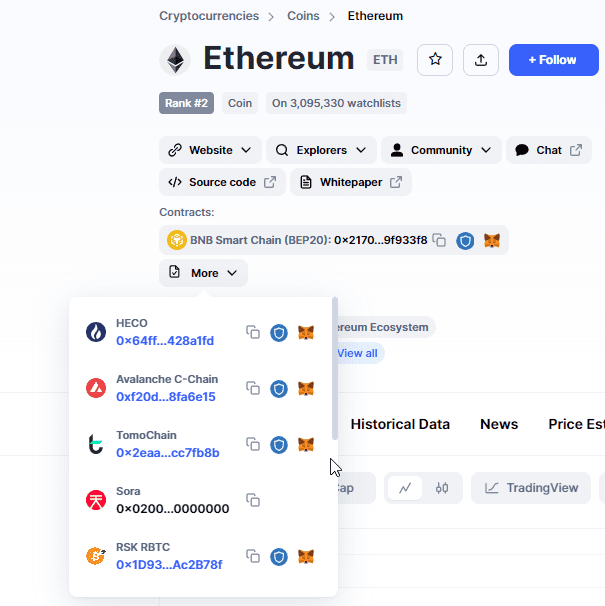
Oftentimes, new projects don’t show up on block explorers or scam tokens rank above them instead. Or maybe there’s an impostor profile on social media that does link to the right website but the bio shows a different token address. You will have to find the buying option on the official website.
Instead of showing the full contract, it may send you to a decentralized exchange like Uniswap. The link shown on the pop-up window should show the official Etherscan listing:
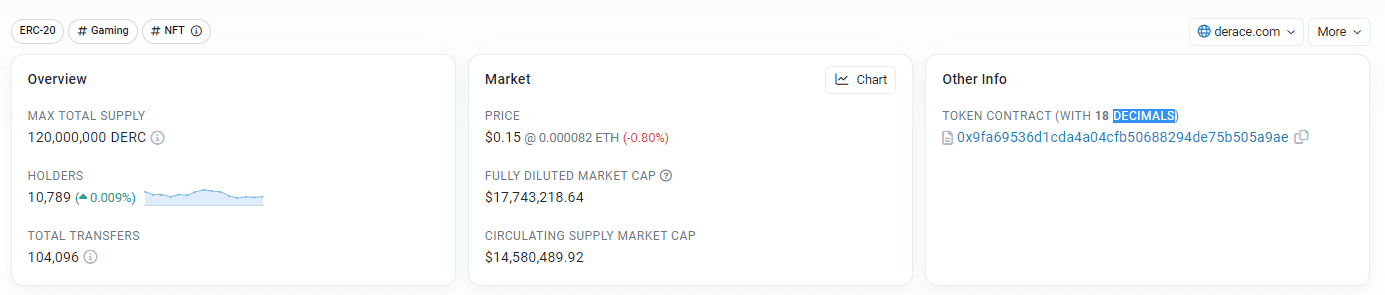
(Fake listings usually show a $0.00 token value, max supply of 999,999, and other nonsense)
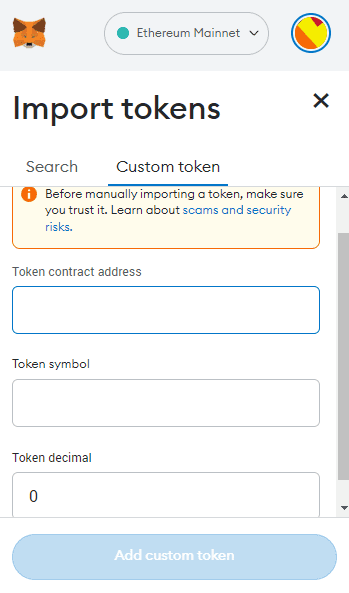
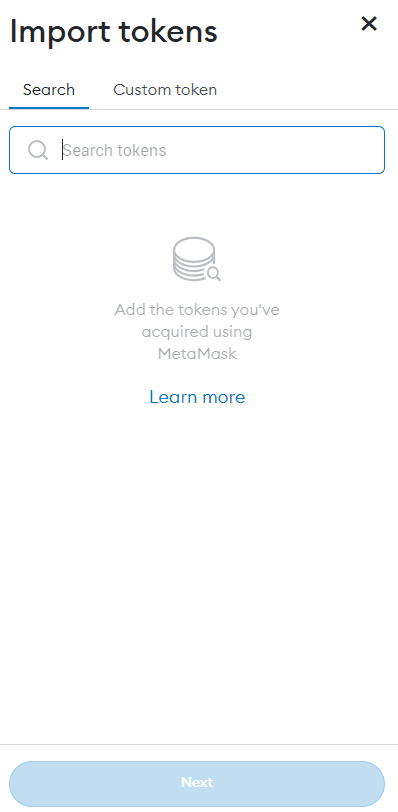
Once you find the real token contract, add the custom token:
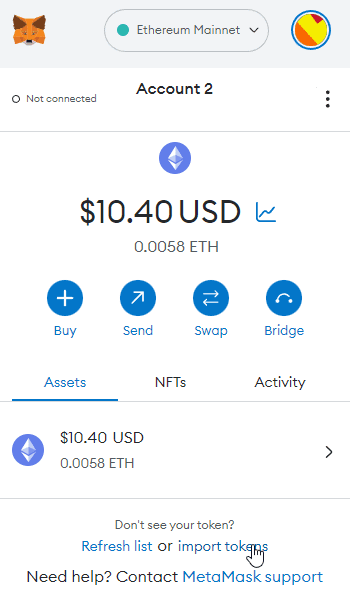
Pasting the address usually autocompletes the rest, but if it doesn’t, it should still show on Etherscan.
A faster is: Import Token > Search > Paste the contract > Confirm. Only typing the symbol also works, but it might be the wrong contract.
To enable this feature, enable “Autodetect Tokens” from Settings > Security and Privacy.
The import process is the same on all networks. If a platform has the same token on multiple blockchains, Etherescan might show it. Otherwise, you’ll need to find each token address on the website. Once a token has been live for a few months, then it should be safe to pull from CoinMarketCap:
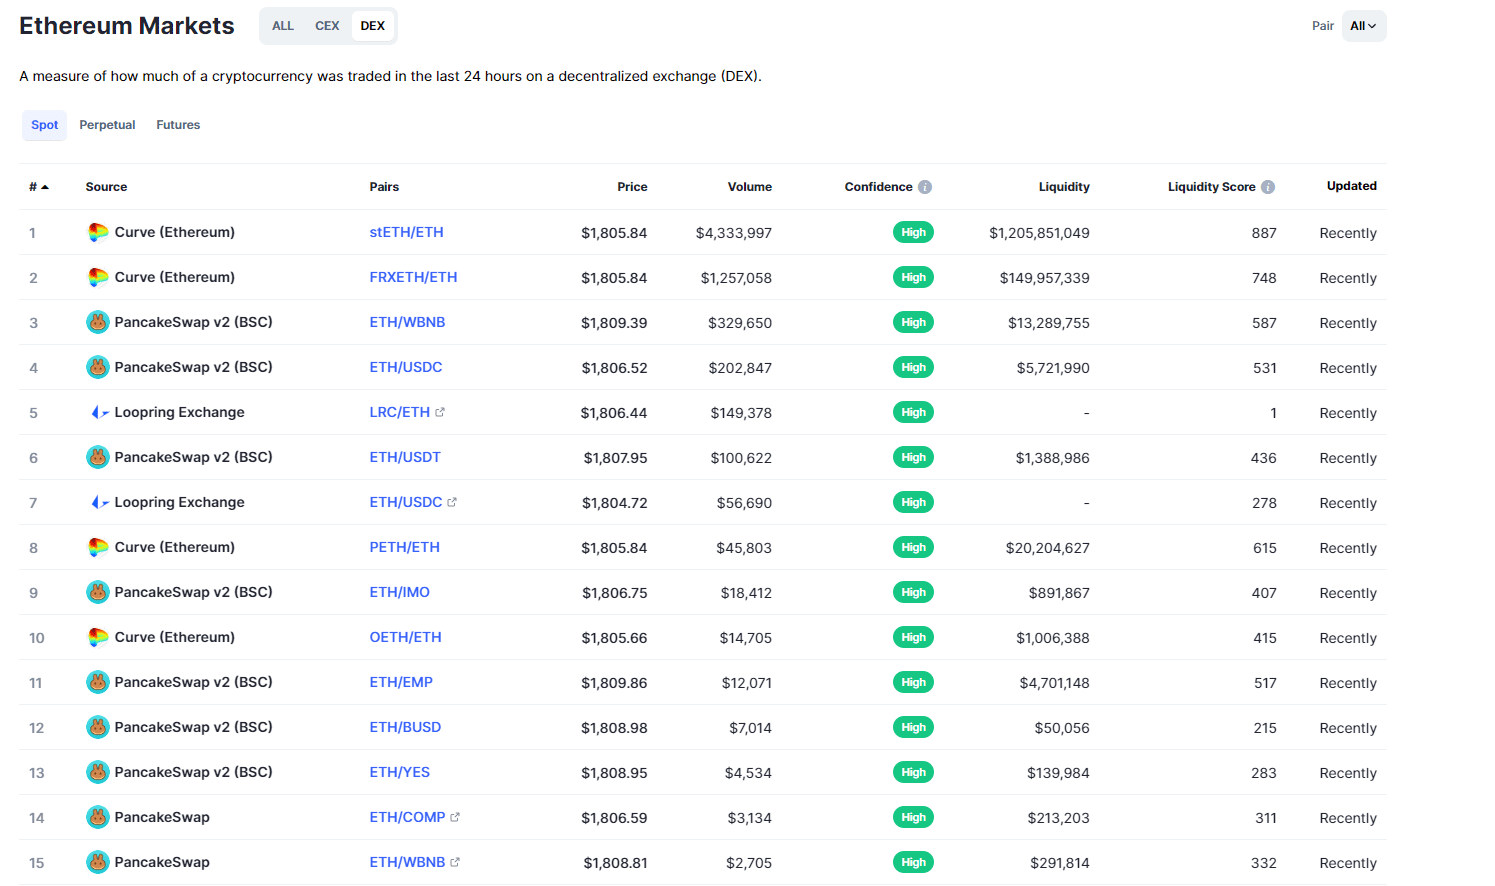
And instead of buying it from your typical exchange, you can scroll down to see where they’re traded the most— which correlates with lower fees.